Yamaha R-S500: PDF инструкция по эксплуатации
Инструкция по эксплуатации Yamaha R-S500. Ниже вы найдете PDF инструкцию на русском языке.
Не нашли ответ на свой вопрос? Напишите нам, и мы оперативно вам поможем.
1
2
3
4

5
6
7
8
9
10
11
12
13
14
15
16
17
18
19
20
21
22
23
24
25
26
27
28
29
30
31
32
33
34

35
36
37
38
39
40
41
42
43
44

45
46
47
48
49
50
51
52
53
54
55
56
57
58
59
60
61
62
63
64
65

Содержание:
- страница 2 – CAUTION: READ THIS BEFORE OPERATING YOUR UNIT.; WARNING
- страница 3 – RADIO DATA SYSTEM; CONTENTS; INTRODUCTION
- страница 4 – Sophisticated AM/FM tuner; FEATURES
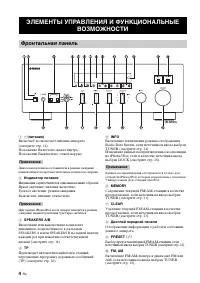
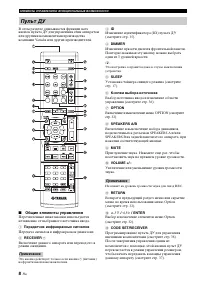
- страница 5 – INTR; Press to control the input source of Zone 2.; Remote control sensor; Receives infrared signals from the remote control.; Front panel display; CONTROLS AND FUNCTIONS; Front panel; Note
- страница 6 – Increases or decreases the sound output level.
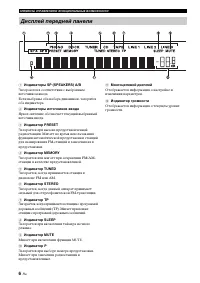
- страница 7 – Lights up when this unit is in the automatic tuning mode.; Europe model only; A B
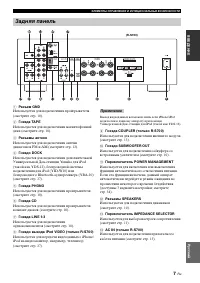
- страница 8 – Connect a subwoofer with built-in amplifier.; Asia and General models only; Rear panel
- страница 9 – Sends infrared signals.
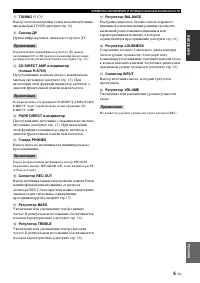
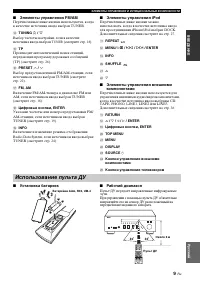
- страница 10 – CODE SET; Sets the sleep timer.; MUTE; Notes
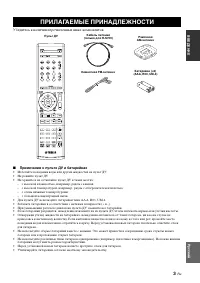
- страница 11 – Notes on batteries; Open the battery compartment cover.; Handling the remote control; Installing batteries in the remote control
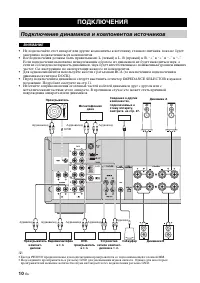
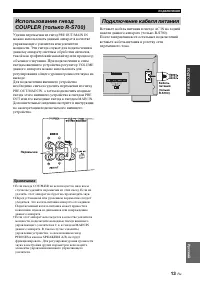
- страница 12 – CONNECTIONS; CAUTION
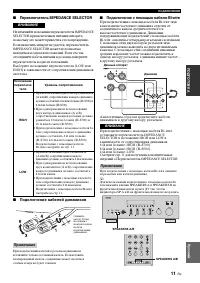
- страница 13 – PREP; Connecting the banana plug; IMPEDANCE SELECTOR; Connecting speakers
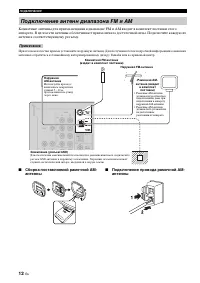
- страница 14 – Connecting the AM and FM antennas
- страница 15 – Connecting the AM loop antenna; Set up the AM loop antenna.
- страница 16 – Main Zone of this unit turns on.; Connecting the power supply cord; Turning on and off this unit
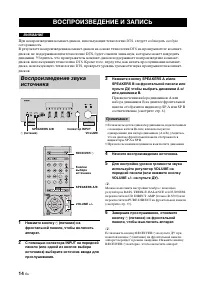
- страница 17 – BA; PLAYING AND RECORDING; Playing a source
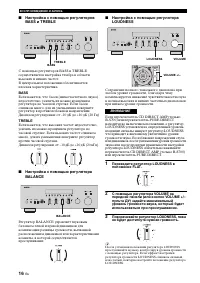
- страница 18 – Adjusting the BALANCE control; Adjust the high and low frequency response.; BASS; Increases or decreases the low frequency response.; TREBLE; Increases or decreases the high frequency response.; Adjusting the LOUDNESS control; Adjusting the tonal quality
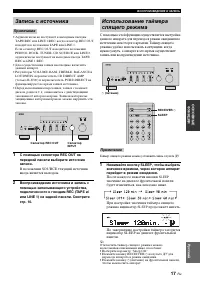
- страница 19 – Play the selected source to record from.; Recording a source
- страница 20 – Start playback on the selected input source.; Using the sleep timer
- страница 21 – Muting the sound output
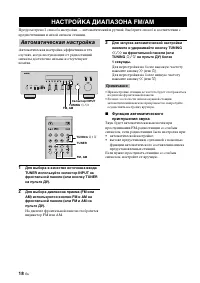
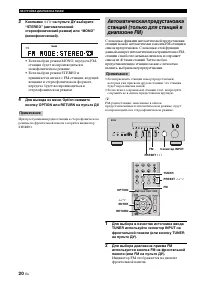
- страница 22 – FM or AM appears in the front panel display.; Press TUNING; Press; Automatic tuning
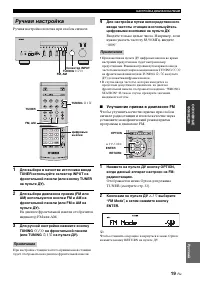
- страница 23 – Manual tuning is effective when station signals are weak.; Hold down the button to continue tuning search.; Manual tuning
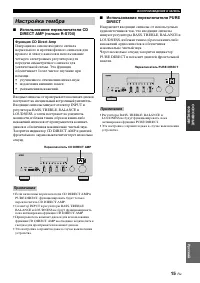
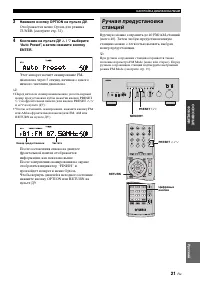
- страница 24 – FM appears in the front panel display.; Automatic preset tuning
- страница 25 – Customized automatic preset tuning
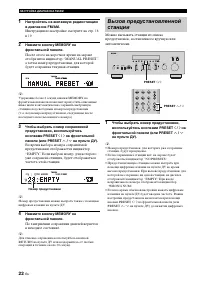
- страница 26 – Manual preset tuning
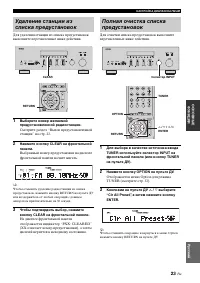
- страница 27 – Selecting preset stations; Exchanging preset stations
- страница 28 – See “EON function” on page 28.
- страница 29 – PTY SEEK function
- страница 30 – • The unit stops searching when it finds a station; To cancel this function; POP M; EON function
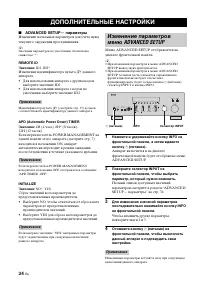
- страница 31 – ADVANCED SETUP menu parameters; Factory presets; PRESET; CANCEL; • Select CANCEL if you do not want the parameters of; Remote; REMOTE; Tuner; TU; ADVANCED SETUP
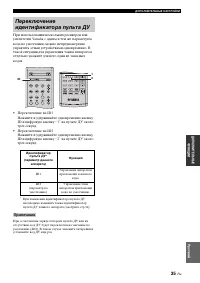
- страница 32 – Switching the remote control ID
- страница 33 – Multi-room configuration and connections; Connecting the Zone 2 components
- страница 34 – Press ZONE 2 CONTROL on the front panel; Controlling Zone 2
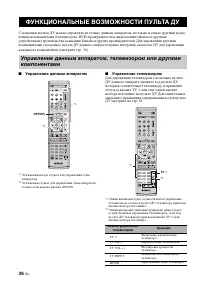
- страница 35 – Controlling this unit; The shaded areas below can be used to control this unit.; Controlling other components; REMOTE CONTROL FEATURES; Control area
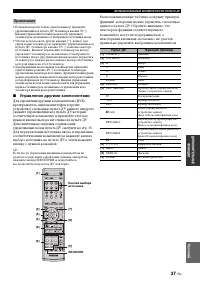
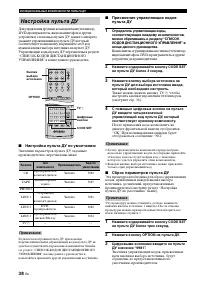
- страница 37 – Remote control code default settings; Setting remote control codes
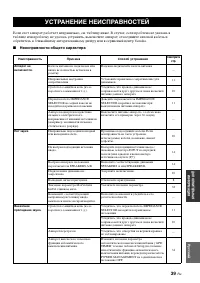
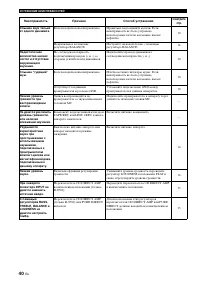
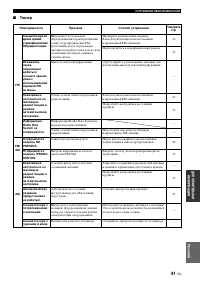
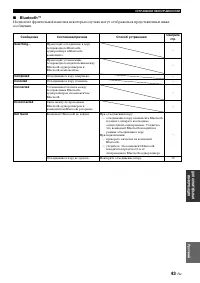
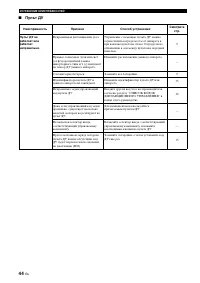
- страница 38 – General; TROUBLESHOOTING
- страница 39 – ADDITION
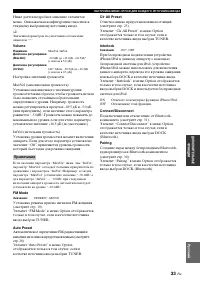
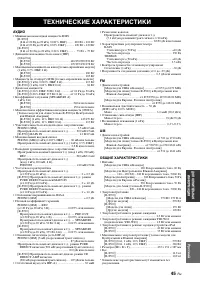
- страница 41 – FM SECTION; GENERAL; SPECIFICATIONS
- страница 42 – ATTENTION: VEUILLEZ LIRE CE QUI SUIT AVANT D’UTILISER; AVERTISSEMENT
- страница 43 – RADIO DATA SYSTEM (MODÈLE POUR; PARTICULARITÉS DE LA; TABLE DES MATIÉRES
- страница 44 – Amplificateur intégré à 2 voies; PARTICULARITÉS
- страница 45 – Appuyez pour régler la source d’entrée de Zone 2.; Capteur de télécommande; Il reçoit les signaux émis par le boîtier de télécommande.; Afficheur de la face avant; Il fournit des informations relatives à l’état de l’appareil.; COMMANDES ET FONCTIONS; Face avant; Remarque; Secours de la mémoire; Remarques
- страница 46 – Ces touches augmentent ou diminuent le niveau sonore.
- страница 47 – S’allume lorsque Zone 2 est activé.; Modèle pour l’Europe seulement
- страница 55 – Raccordements de l’antenne cadre AM; Raccordements de l’antenne cadre AM.
Загрузка инструкции
Receiver
Ampli-Tuner
OWNER’S MANUAL
MODE D’EMPLOI
BEDIENUNGSANLEITUNG
BRUKSANVISNING
MANUALE DI ISTRUZIONI
MANUAL DE INSTRUCCIONES
GEBRUIKSAANWIJZING
ИНСТРУКЦИЯ ПО ЭКСПЛУАТАЦИИ
G